Tutorials
Setting up your first site
So, you just signed up for an account and you’re not quite sure what’s next? This tutorial will walk you through integrating your very first website in Surreal.
1. Connect to your site
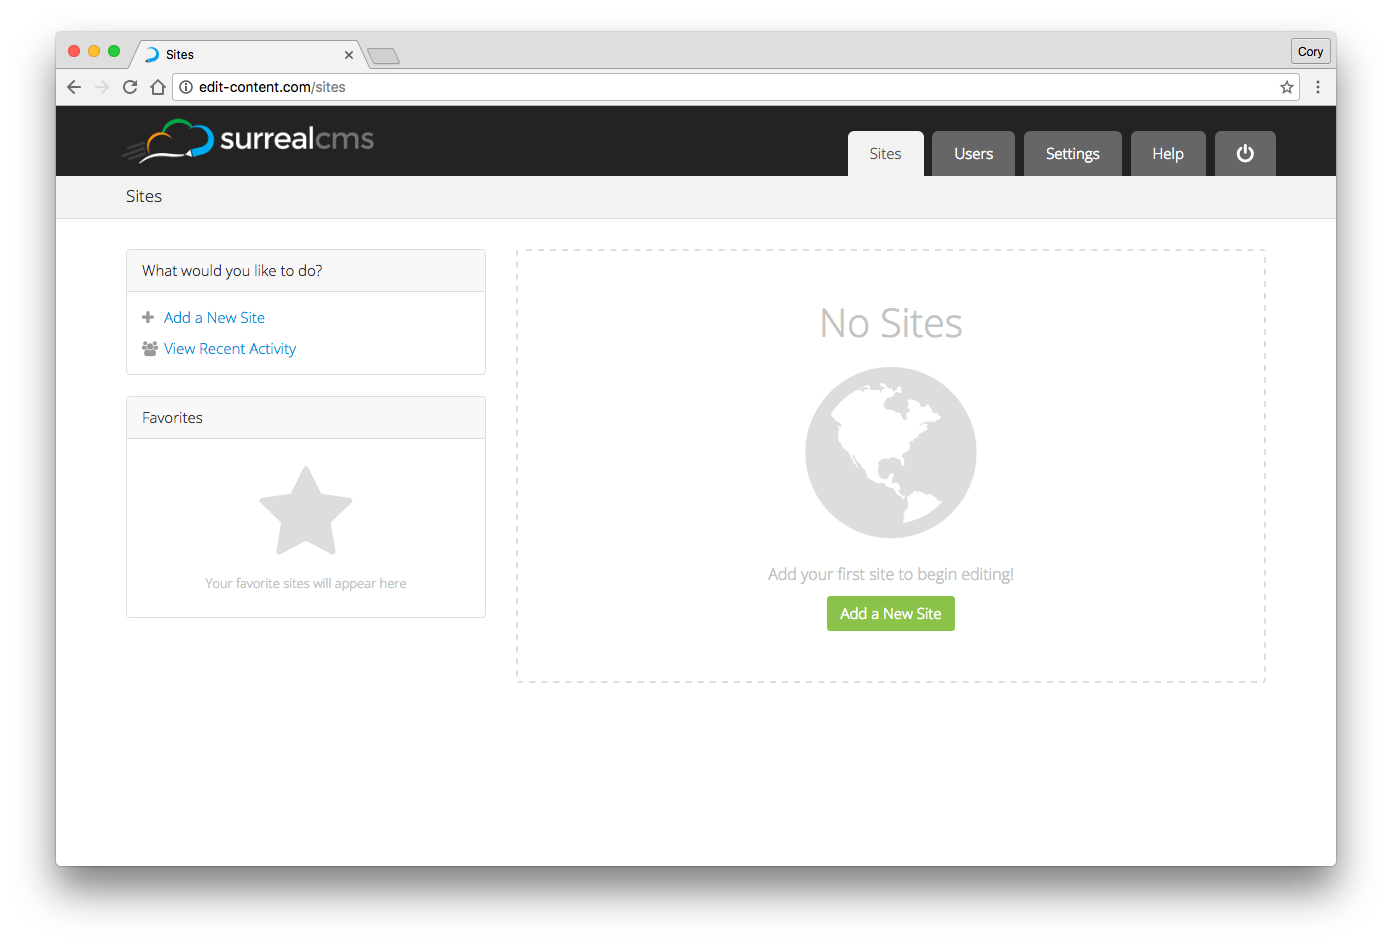
The first step after creating an account is to add your site so Surreal can connect to it. Select Add a New Site from the following screen.
Don’t let this next part scare you—it’s actually quite simple. I’ll explain below.
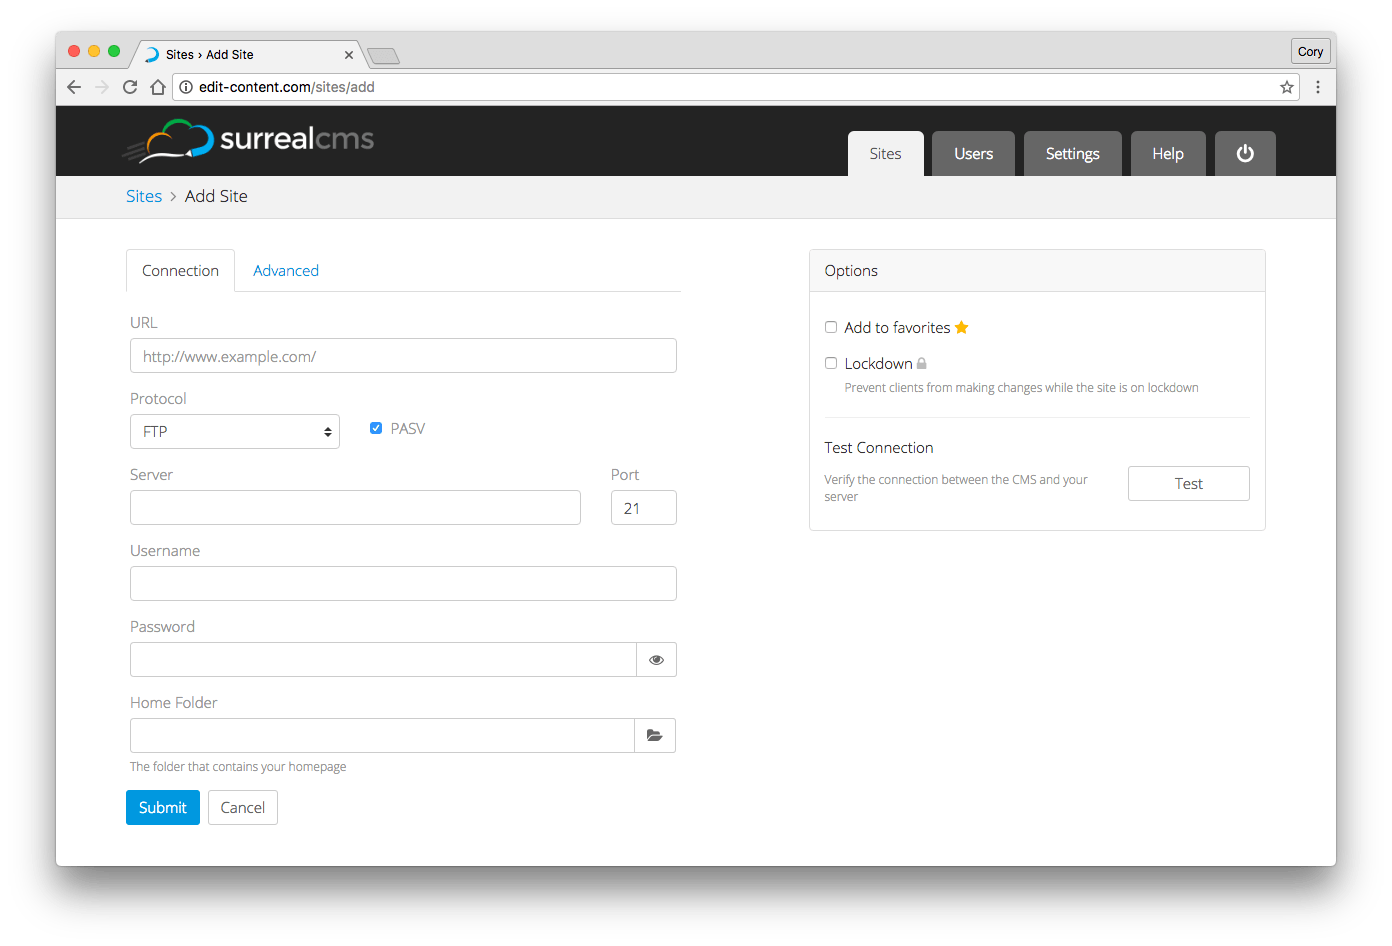
This form may remind you of an FTP client. That’s about right, because Surreal connects to your site over FTP or SFTP. Here’s what each field means:
URL — Your website’s URL. For example: http://www.example.com/
Protocol — The method in which Surreal will connect to your site. Usually FTP or SFTP.
PASV — Select this if your server requires a passive connection. If you have trouble connecting, try toggling this option.
Server — The location of your FTP server. Typically
ftp.example.com or possibly just example.com.
Port — The port through which to connect. The default is 21 for FTP and 22 for SFTP. If you’re not sure, stick with the default.
Username & Password — The FTP or SFTP username and password you use to connect to your server. This is usually not the same as your web host’s control panel login.
Home Folder — The folder that contains your homepage. If you’re not sure, use the browse button to locate it on the server.
Once you’ve filled in those fields, test the connection to make sure everything checks out. If so, hit Submit and continue to the next step. Don’t worry about the Advanced tab for now—you can always update those settings later.
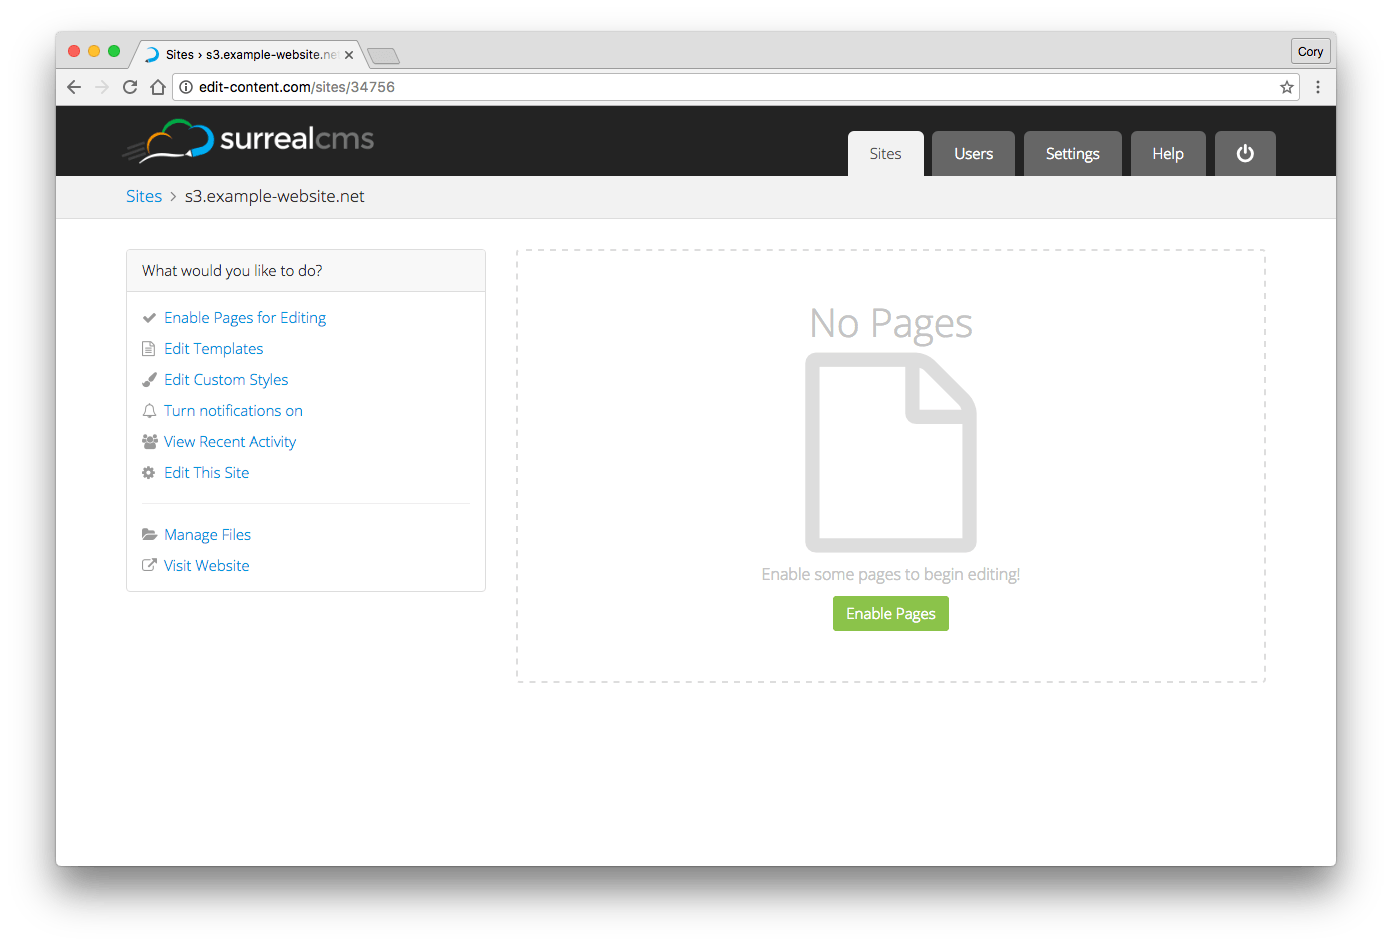
2. Enable pages
Now that you’ve added your site, the next step is to enable a page or two for editing. Select Enable Pages from the following screen.
A modal will appear showing the contents of your home folder. If you don’t see your homepage, go back to step 1 and update your home folder. If you do see your homepage, continue on.
Select one or more pages from the list to enable editing.
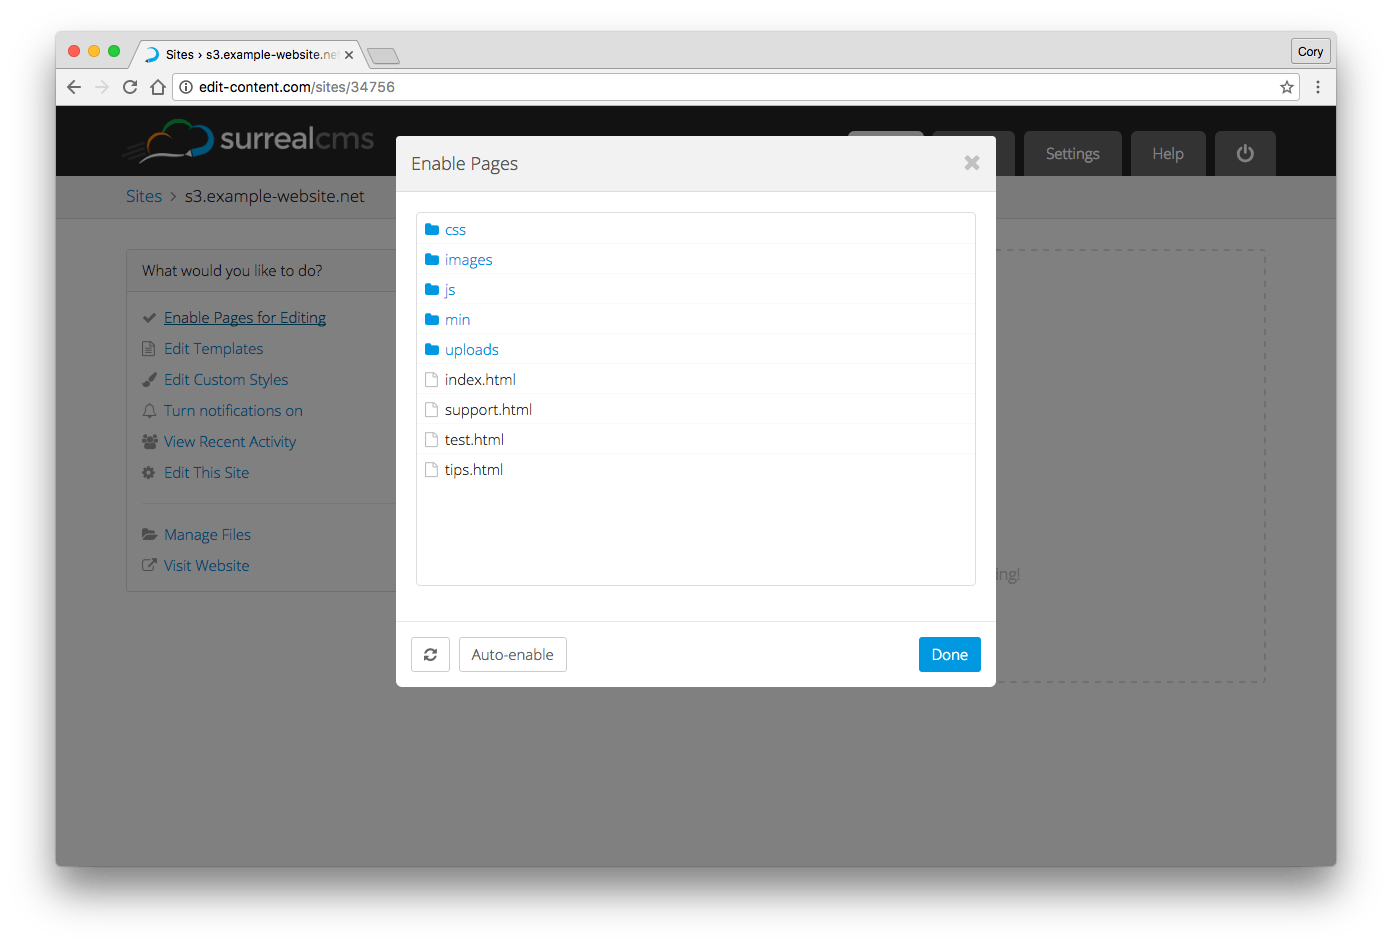
Now that you’ve enabled a page or two, hit Done. Your pages will show up in the CMS like this:
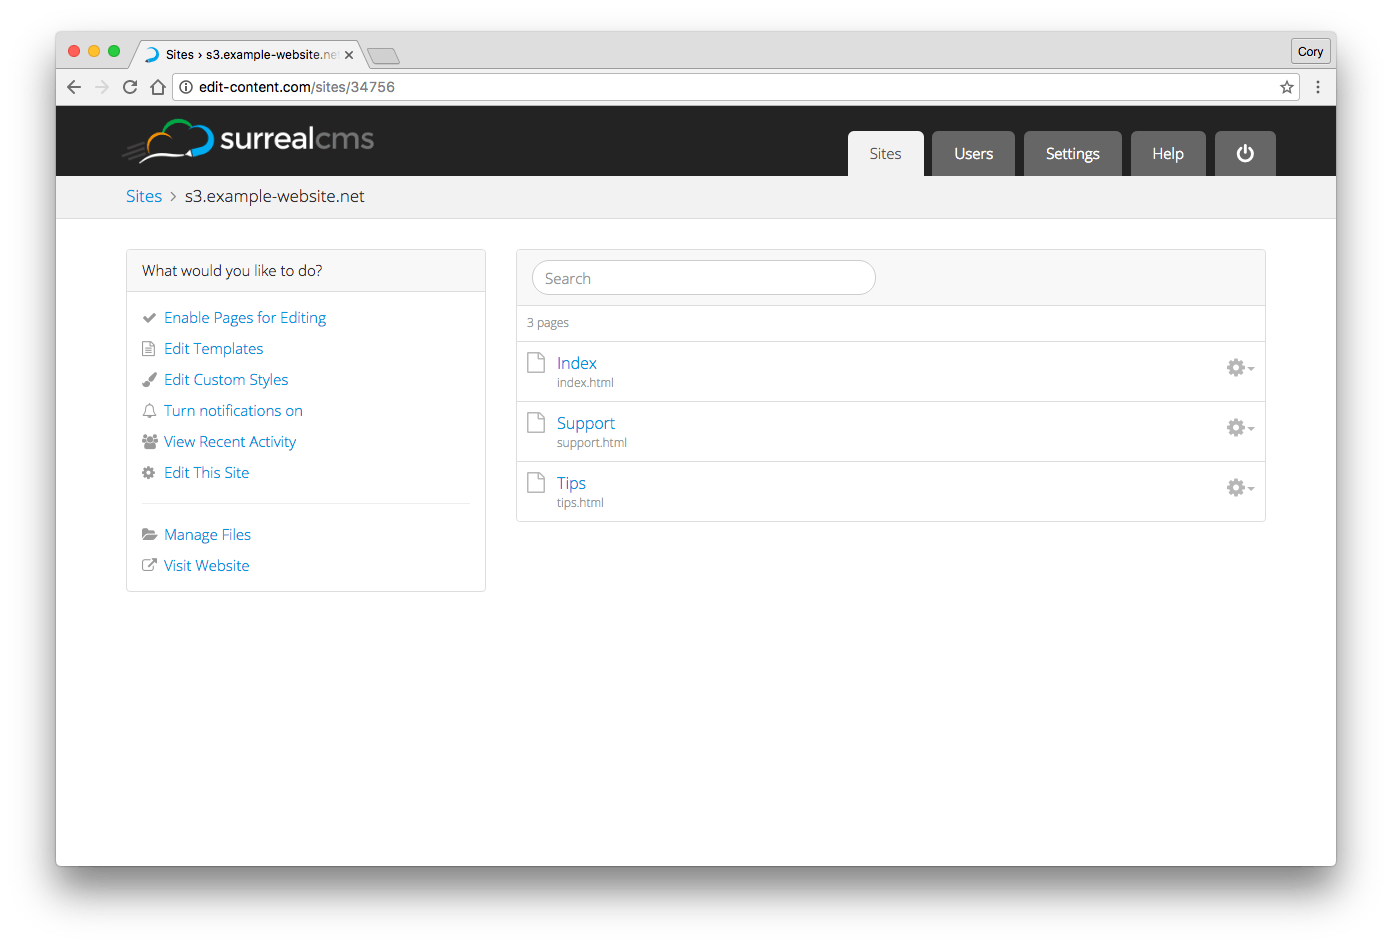
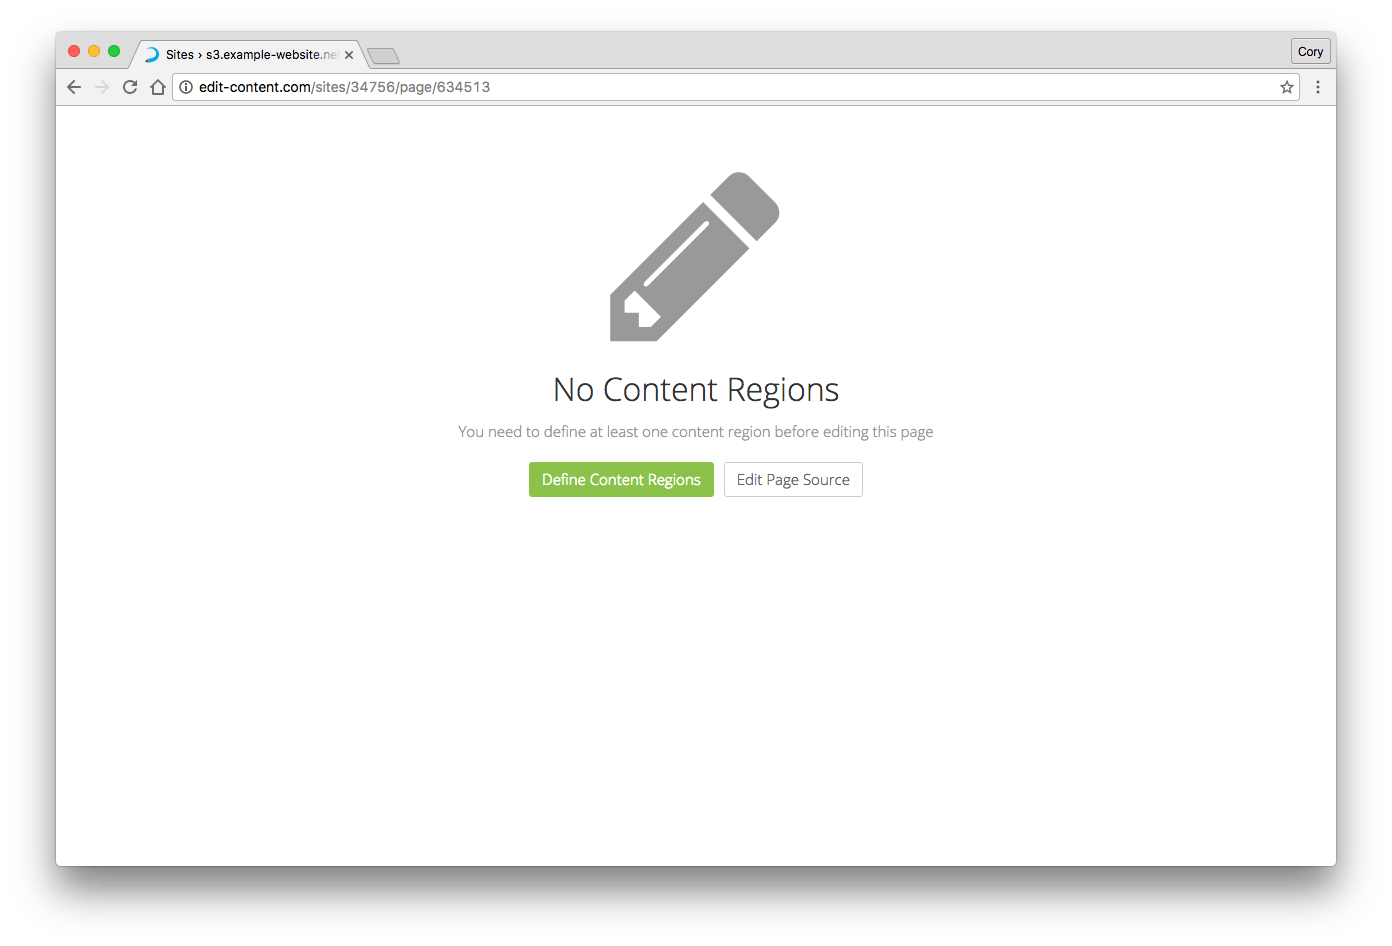
Chances are, if you’re new to Surreal, you haven’t defined any content regions yet. If that’s the case, you’ll see the following screen. Now you’re just one step away from editing!
3. Define content regions
The last step before you can edit a page is to define one or more content regions. In Surreal, this is done by adding a CSS class to your HTML. For example:
<div class="editable">
    <p>Now you can edit this</p>
</div>
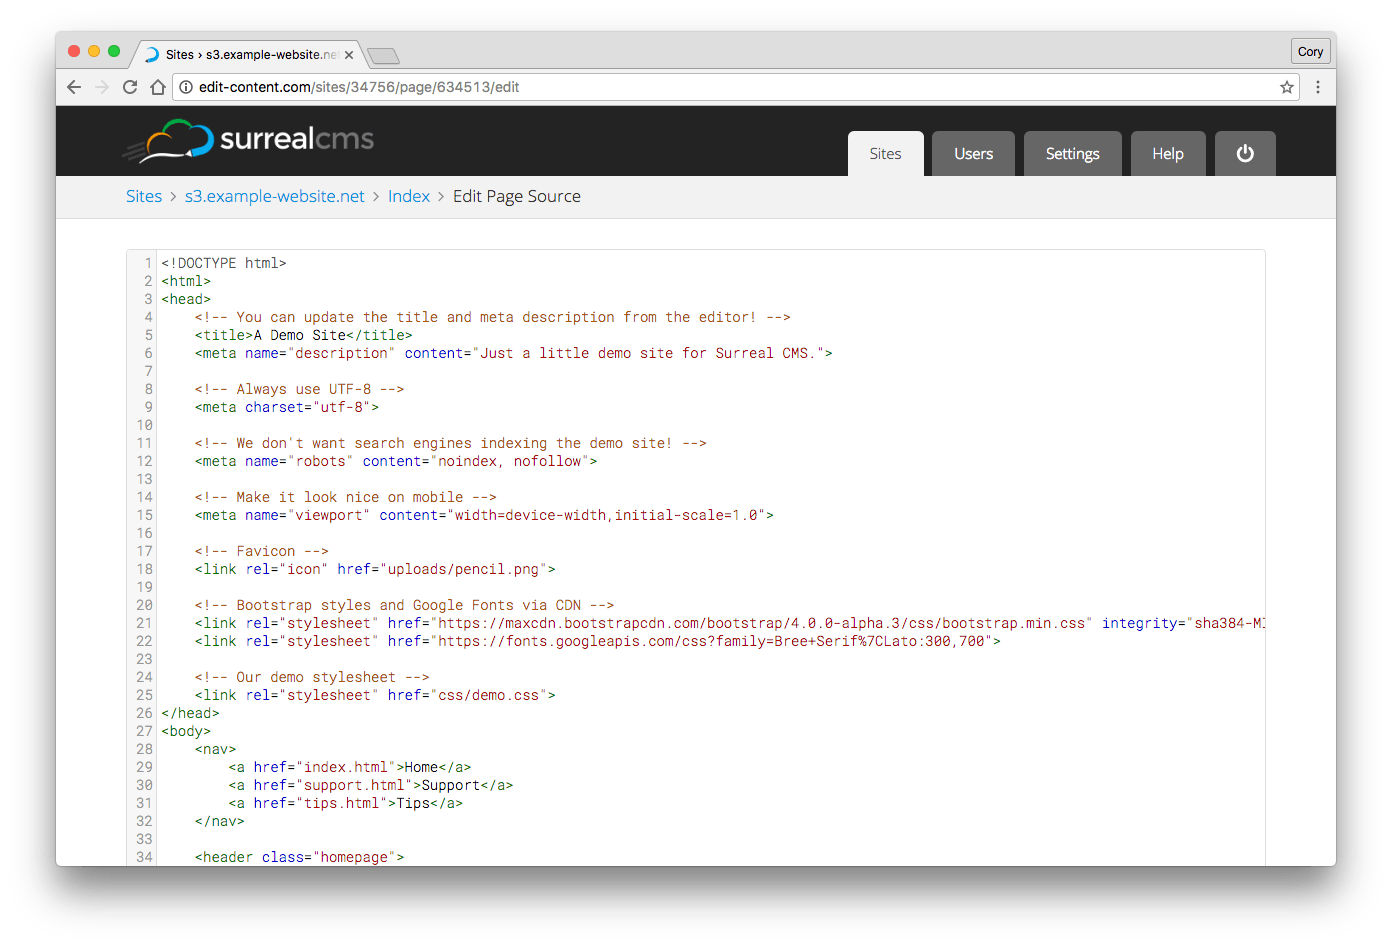
Don’t want to edit code? Use the click-to-define region editor by selecting Define Content Regions.
Fortunately, you can do this right from Surreal. Select Edit Page Source to go to the Source Editor. Here’s what you’ll see:
Just add the editable class like this:
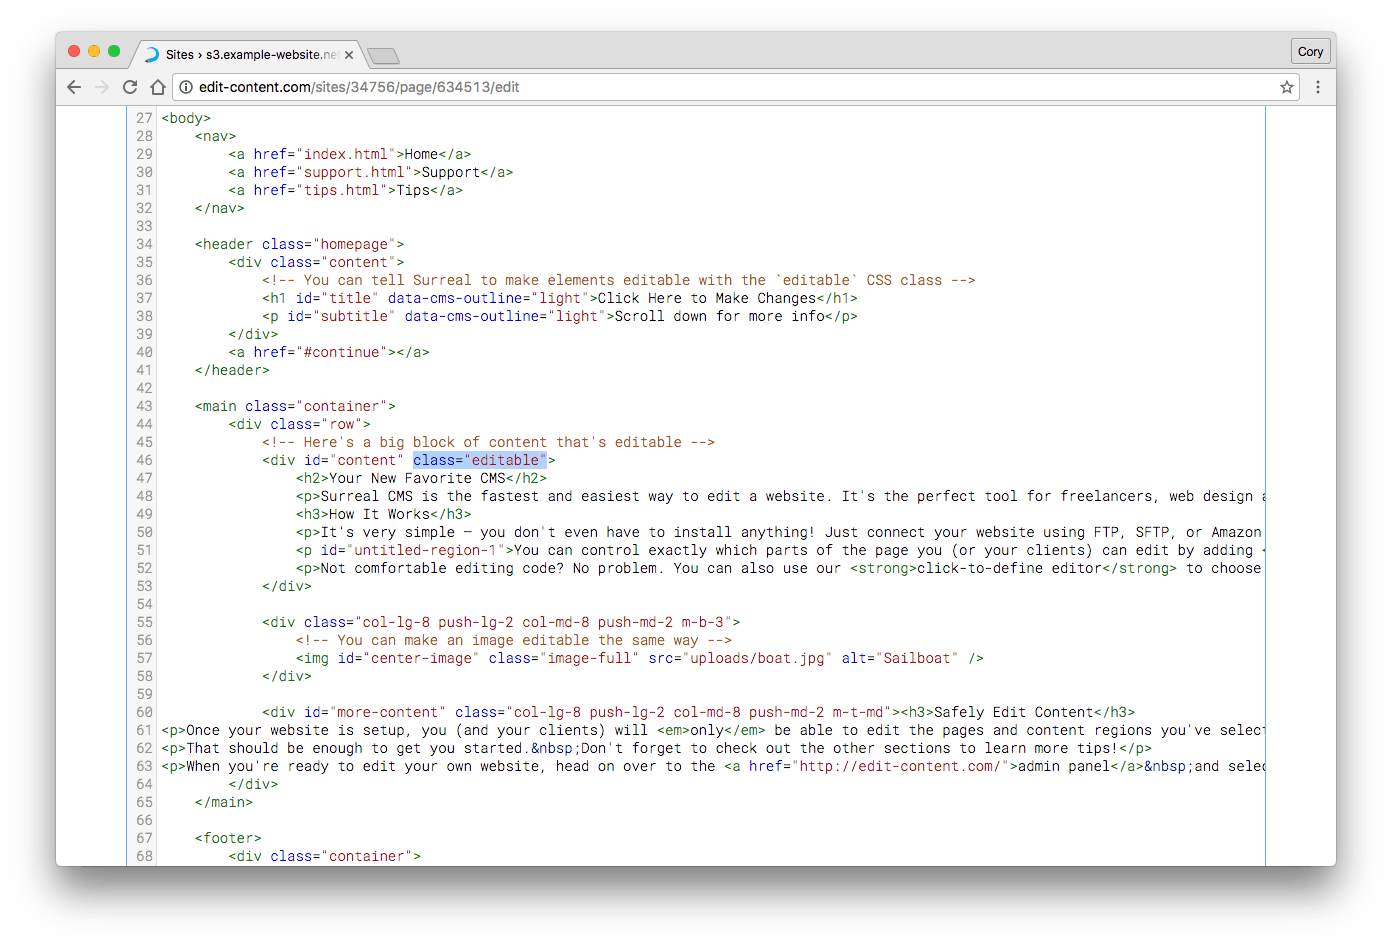
class="editable" to make an element editable.
For more details about defining content regions, check out this page in the docs. Once you’ve made a similar section of your own page editable, hit Submit.
4. Start editing
Now that you’ve defined at least one editable region, you’ll see your page in the Live Editor. Here’s a glimpse of our About page from the example:
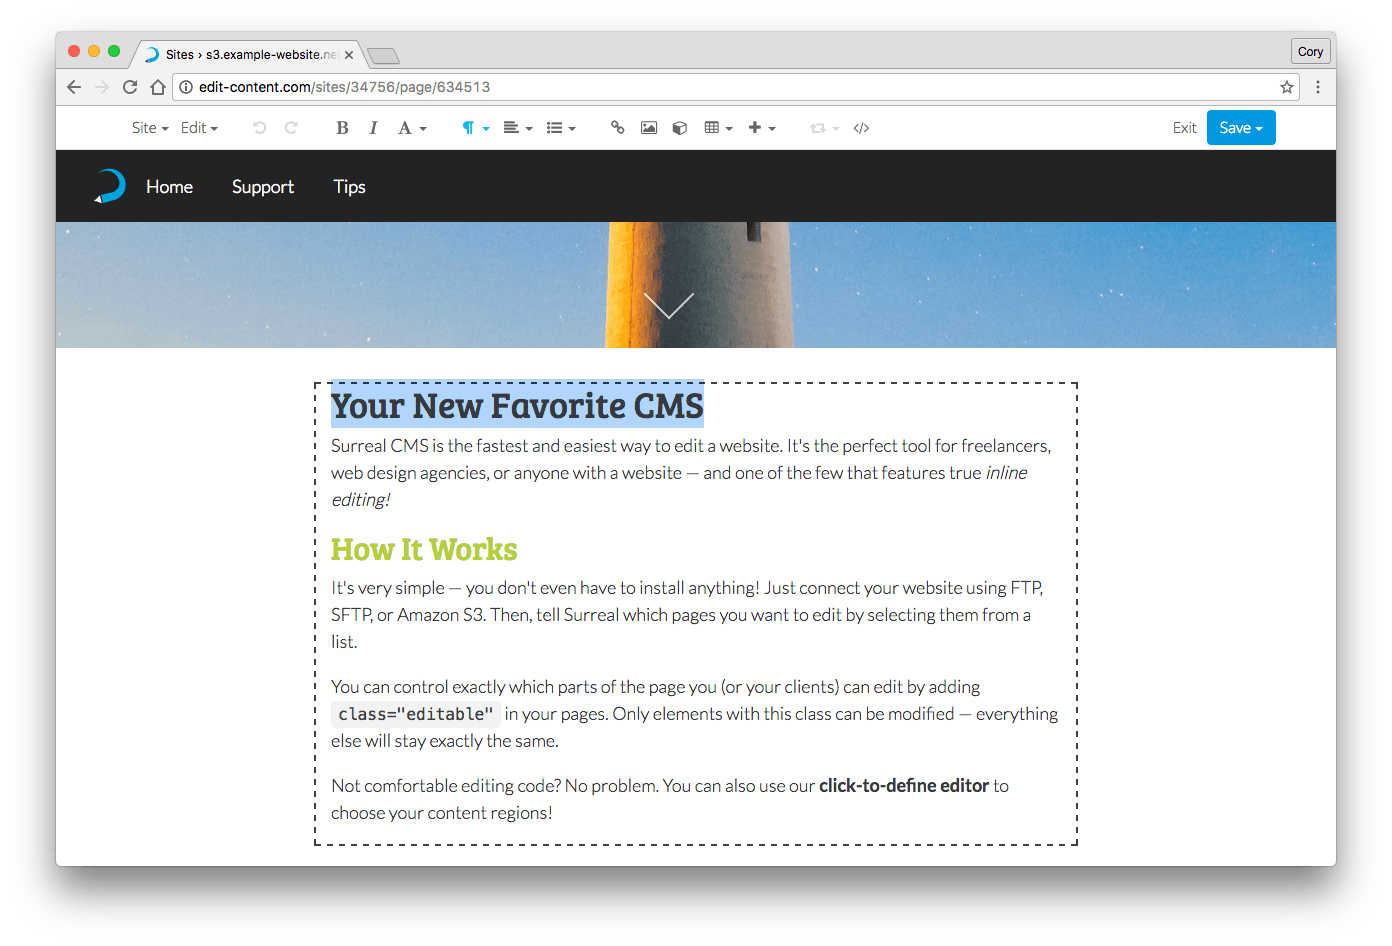
Note the dashed outlines when you hover over a content region. This indicates the content can be changed. Just click or tap anywhere inside the region and make your changes. You can use the toolbar to format text, create lists, insert images, and more! When you’re done editing, simply hit Save > Publish.
Congratulations! You’ve just edited your first page in Surreal. If you ran into any snags along the way, submit a help request and we’ll help you work it out.